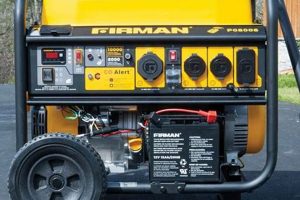
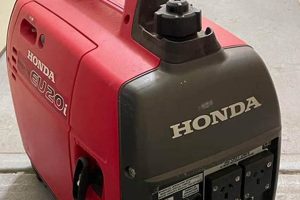
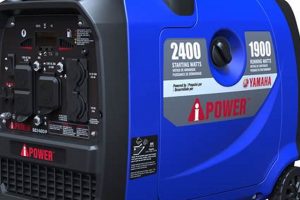
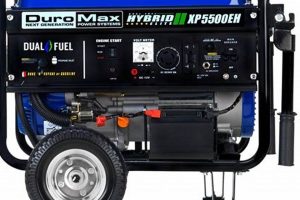
Overhauling a small, mobile power source involves a systematic process of disassembly, inspection, repair or replacement of worn components, and reassembly. This typically includes evaluating and potentially servicing the engine (e.g., replacing piston rings, valves, or gaskets), the fuel system (e.g., cleaning the carburetor, replacing fuel lines), the generator itself (e.g., checking brushes and windings), and the starting system. A comprehensive restoration may also involve cleaning and repainting the unit’s exterior.
Restoring a portable power source to optimal function provides several advantages. A well-maintained unit offers reliable power during outages, contributing to safety and convenience. Refurbishing an existing generator is often more economical than purchasing a new one and contributes to sustainable practices by extending the lifespan of existing equipment. This practice has become increasingly relevant with the rising demand for backup power solutions in both residential and commercial settings.
The following sections will detail the necessary steps and considerations involved in this process, covering topics such as safety precautions, required tools, diagnostic procedures, component-specific repairs, and final testing.
Tips for Generator Rebuilding
Careful planning and execution are essential for a successful restoration. These tips provide valuable insights to ensure a smooth and effective process.
Tip 1: Safety First: Disconnect the spark plug before initiating any work to prevent accidental starting. Work in a well-ventilated area to avoid fume inhalation.
Tip 2: Documentation is Key: Photograph each step of the disassembly process. This detailed visual record simplifies reassembly and helps track components.
Tip 3: Invest in a Quality Repair Manual: A model-specific manual provides detailed diagrams, specifications, and troubleshooting guidance relevant to the specific unit.
Tip 4: Cleanliness is Crucial: Thoroughly clean components as they are disassembled. This aids in accurate inspection and prevents contaminants from entering the reassembled engine.
Tip 5: Systematic Inspection: Carefully inspect each component for wear, damage, or corrosion. Consult the repair manual for acceptable tolerances and replacement guidelines.
Tip 6: Use Quality Replacement Parts: Opt for original equipment manufacturer (OEM) parts or high-quality aftermarket equivalents for optimal performance and longevity.
Tip 7: Test Thoroughly: After reassembly, test the unit under load to verify proper function and identify any remaining issues.
Adhering to these tips will increase the likelihood of a successful restoration, resulting in a reliable and efficient power source.
By understanding the procedures and taking the necessary precautions, the rebuilding process can be a rewarding endeavor, providing a cost-effective solution for reliable backup power.
1. Assessment
A thorough assessment forms the foundation of a successful generator rebuild. This preliminary stage involves systematically evaluating the unit’s condition to determine the extent of repairs needed. Accurate assessment guides subsequent decisions regarding component replacement, preventing unnecessary expenditure and ensuring effective restoration.
- Visual Inspection
A detailed visual inspection identifies external damage, corrosion, loose connections, and signs of wear. This includes examining the fuel tank, air filter, spark plug, control panel, and overall housing. For example, a cracked fuel line or corroded terminals indicates the need for replacements. Visual cues provide valuable initial insights into the generator’s condition.
- Functional Testing
Functional tests evaluate the generator’s operational capabilities. This includes starting the unit, checking voltage output under load, and monitoring engine performance. A sputtering engine or fluctuating voltage output signals potential problems within the fuel system or generator itself. These tests pinpoint areas requiring further investigation.
- Compression Test
A compression test measures the pressure within the cylinders during the compression stroke. Low compression indicates worn piston rings, valves, or a damaged head gasket. This diagnostic procedure provides crucial information about the engine’s internal condition and the potential need for major repairs.
- Leak Down Test (Optional)
A leak down test, while optional, offers a more precise diagnosis of engine leaks. It involves pressurizing the cylinder and measuring the rate of pressure loss. This test can identify the specific location of leaks, such as valves, piston rings, or head gasket, providing detailed insights beyond the compression test.
The insights gathered during the assessment phase directly inform subsequent disassembly, repair, and reassembly steps. A comprehensive evaluation ensures that all necessary repairs are addressed, leading to a fully functional and reliable restored generator.
2. Disassembly
Disassembly is a crucial stage in rebuilding a portable generator. It involves the systematic removal of components, providing access for inspection, repair, and replacement. Careful disassembly, coupled with meticulous documentation, is essential for successful reassembly and ensures that all underlying issues are addressed. The process must be approached methodically to avoid causing further damage and to maintain the integrity of the components.
The effectiveness of the rebuild hinges on the thoroughness of the disassembly process. For example, failure to remove and inspect the carburetor thoroughly during disassembly might overlook a clogged jet, leading to performance problems after reassembly. Similarly, neglecting to disconnect all electrical connections before removing components could damage sensitive electronic parts. The extent of disassembly depends on the specific issues identified during the assessment phase. If the assessment indicates a faulty AVR (Automatic Voltage Regulator), the disassembly will focus on accessing and removing this specific component. Conversely, a suspected engine problem would necessitate a more extensive disassembly to access internal engine parts.
Systematic disassembly, supported by detailed documentation, such as photographs and labeled bags for small parts, minimizes the risk of errors during reassembly and ensures that all components are properly inspected and serviced. This meticulous approach contributes significantly to the overall success of the generator rebuild, ensuring that the restored unit operates reliably and efficiently.
3. Component Repair/Replacement
Component repair or replacement represents a core element of rebuilding a portable generator. This stage directly addresses the issues identified during the assessment phase, contributing significantly to restoring the generators functionality and longevity. Decisions regarding repair versus replacement depend on factors such as the extent of damage, component availability, and cost-effectiveness. For example, a worn-out spark plug necessitates replacement, while a corroded fuel tank might be repairable depending on the severity of the corrosion. Similarly, a damaged recoil starter assembly might be replaced entirely if sourcing individual parts proves impractical.
Careful consideration must be given to the quality of replacement parts. Opting for original equipment manufacturer (OEM) parts or high-quality aftermarket alternatives ensures compatibility and durability. Using substandard parts can lead to premature failure and compromise the generator’s overall performance. For instance, replacing a failed voltage regulator with a low-quality substitute may result in unstable voltage output, potentially damaging connected devices. Furthermore, component-specific repair procedures necessitate appropriate tools and expertise. Servicing a carburetor, for example, requires specialized tools like carburetor cleaner and a jet adjustment tool. Attempting repairs without the proper tools and knowledge can cause further damage and hinder the rebuilding process.
Effective component repair and replacement ensures the long-term reliability of the rebuilt generator. Addressing each component’s condition meticulously minimizes the risk of recurring issues and optimizes performance. This process, executed correctly, forms the cornerstone of a successful generator rebuild, ultimately providing a reliable and cost-effective power solution.
4. Reassembly
Reassembly represents the culmination of the generator rebuilding process, bringing together the serviced and replaced components to form a functional unit. This stage demands precision and meticulous attention to detail, mirroring the disassembly process in reverse. Correct reassembly is critical for the generator’s safe and efficient operation, directly impacting its performance and longevity. A systematic approach, guided by documentation created during disassembly, ensures that all components are correctly installed and connected.
- Component Placement and Orientation
Each component must be installed in its correct location and orientation. For example, the carburetor must be mounted securely with the correct gasket and aligned properly for fuel line connections. Similarly, internal engine components, such as piston rings and valves, have specific orientations that must be adhered to for proper engine function. Incorrect placement can lead to mechanical interference, leaks, or malfunction.
- Fastener Torque Specifications
Applying the correct torque to fasteners is crucial to prevent damage and ensure secure connections. Over-tightening can strip threads or crack components, while under-tightening can lead to vibrations and loosening during operation. A torque wrench and the generator’s service manual provide the necessary specifications for each fastener, guaranteeing secure and reliable assembly.
- Wiring and Electrical Connections
Reassembling electrical connections requires careful attention to wiring diagrams and connector placement. Miswiring can lead to short circuits, damage to electronic components, or improper generator operation. For example, incorrectly connecting the AVR (Automatic Voltage Regulator) can result in unstable voltage output or complete generator failure. Thoroughly checking all connections against the wiring diagram is essential.
- Fuel System Integrity
Ensuring the integrity of the fuel system is paramount for safe and reliable operation. This involves inspecting and replacing any damaged fuel lines, ensuring tight connections at all joints, and verifying proper carburetor installation. Leaks in the fuel system pose a significant fire hazard and can lead to performance issues. A pressure test of the fuel system after reassembly can identify any potential leaks.
The reassembly process directly influences the rebuilt generator’s overall performance, reliability, and safety. Meticulous attention to detail during this stage, combined with thorough testing after reassembly, ensures that the generator functions as intended, providing a dependable source of power when needed. A systematic approach, referencing documentation from the disassembly process, minimizes errors and contributes to the successful restoration of the generator.
5. Testing
Testing represents the critical final stage in rebuilding a portable generator, validating the effectiveness of the rebuild process and ensuring safe, reliable operation. This essential step confirms that all components function harmoniously and the generator performs according to specifications. Testing bridges the gap between rebuilding and practical application, providing assurance of the unit’s readiness for service. Omitting this crucial step risks undetected issues surfacing during actual use, potentially leading to equipment damage, power failures, or safety hazards.
Several key tests should be performed after reassembly: a no-load test verifies basic functionality and voltage output without any connected load. A loaded test, using an appropriate electrical load, evaluates the generator’s ability to maintain stable voltage and frequency under realistic operating conditions. An extended loaded test, conducted over a longer period, simulates real-world usage and can reveal intermittent issues that might not surface during shorter tests. For example, a generator might pass a short loaded test but exhibit voltage fluctuations during an extended run, indicating a potential problem with the voltage regulator or other components. Furthermore, testing procedures should encompass safety checks, such as verifying proper grounding and GFCI (Ground Fault Circuit Interrupter) functionality to mitigate electrical shock hazards. Documenting test results provides a valuable record of the generator’s performance after the rebuild, aiding in future troubleshooting and maintenance.
Comprehensive testing, encompassing various operating conditions, provides crucial confirmation of a successful rebuild. This final step validates the restoration effort, minimizing the risk of unforeseen issues and maximizing the generator’s long-term reliability and safe operation. Neglecting thorough testing compromises the entire rebuilding process, jeopardizing the investment of time and resources dedicated to restoring the generator to optimal functionality.
Frequently Asked Questions
This FAQ section addresses common inquiries regarding the complexities of restoring portable generators, offering practical insights and clarifying potential misconceptions.
Question 1: What specialized tools are essential for a generator rebuild?
Essential tools typically include a socket set, wrenches, screwdrivers, a multimeter, a compression tester, and potentially a carburetor cleaning kit. Specific tools may vary depending on the generator model.
Question 2: Is rebuilding a generator a cost-effective solution compared to buying a new one?
Rebuilding is often more economical than purchasing a new generator, especially for older models where parts are readily available. A cost-benefit analysis, considering the extent of repairs needed, can inform this decision.
Question 3: What are the common signs indicating a generator requires rebuilding?
Common indicators include difficulty starting, erratic performance, unusual noises, excessive vibration, low power output, and excessive fuel consumption. A thorough assessment can pinpoint the underlying causes.
Question 4: How can one ensure the safety of a rebuilt generator?
Thorough testing after reassembly, including verifying proper grounding and GFCI functionality, is crucial. Adhering to safe operating procedures outlined in the owner’s manual is essential for continued safe operation.
Question 5: Where can one find reliable information regarding specific generator models?
Manufacturer websites and model-specific repair manuals provide detailed information on parts, diagrams, and troubleshooting procedures. Online forums and communities can also offer valuable insights.
Question 6: What are the environmental implications of rebuilding versus replacing a generator?
Rebuilding extends the lifespan of existing equipment, reducing electronic waste. This aligns with sustainable practices by conserving resources and minimizing environmental impact compared to discarding and purchasing a new unit.
Careful consideration of these frequently asked questions provides a deeper understanding of the process, empowering individuals to make informed decisions regarding their portable generators.
The next section will provide additional resources and references for further exploration of generator maintenance and repair.
How to Rebuild a Portable Generator
Successfully rebuilding a portable generator involves a systematic approach encompassing assessment, disassembly, component repair/replacement, reassembly, and rigorous testing. Each stage plays a crucial role in ensuring the restored unit’s reliability, efficiency, and safety. Careful attention to detail, proper documentation, and the use of quality parts contribute significantly to the process’s overall success. From diagnosing the initial problem to validating the final outcome, a methodical approach is essential for achieving optimal results. Neglecting any stage can compromise the generator’s performance and longevity, potentially leading to safety hazards and operational failures.
Restoring a portable generator represents a sustainable and often cost-effective alternative to replacement. This empowers individuals to maintain access to reliable backup power while minimizing environmental impact. Embracing preventative maintenance practices and adhering to proper operating procedures further extends the lifespan of these essential power sources. The knowledge and skills gained through the rebuilding process provide a foundation for long-term generator maintenance, ensuring reliable performance when needed most.

